iOS SDK
Explains how the iOS SDK works, how to set it up, and how it delivers card-present and Tap to Pay experiences.
SumUp provides a native iOS SDK(Opens in a new tab) that enables you to integrate SumUp’s proprietary card terminal(s) and its payment platform to accept credit and debit card payments (incl. VISA, MasterCard, American Express and more) as well as Tap to Pay on iPhone payments. SumUp’s SDK communicates transparently to the card terminal(s) via Bluetooth. Upon initiating a checkout, the SDK guides your user using appropriate screens through each step of the payment process. As part of the process, SumUp also provides the card terminal setup screen, along with the cardholder signature verification screen. The checkout result is returned with the relevant data for your records.
No sensitive card data is ever passed through to or stored on the merchant’s phone. All data is encrypted by the card terminal, which has been fully certified to the highest industry standards (PCI, EMV I & II, Visa, MasterCard & Amex).
SumUp iOS SDK is provided as an Objective C binary. However, when you use the SDK in Swift projects, Xcode uses automatic bridging to generate Swift-friendly interfaces from the Objective-C headers. For that reason, code samples in this guide are provided both in Swift and Objective C.
The iOS SDK includes a Sample App(Opens in a new tab), which you can run out-of-the-box to immediately test the implementation in practice.
Prerequisites
Section titled “Prerequisites”- Registered for a merchant account via SumUp’s country websites(Opens in a new tab) or use a sandbox merchant account.
- Received SumUp card terminal: Solo Lite, Solo, Air, 3G, PIN+.
- Requested an Affiliate (Access) Key in the Developer Settings(Opens in a new tab) of the SumUp Dashboard.
- Xcode 26.2 or later.
- Deployment Target iOS 16.0 or later.
- iPhone or iPad.
- If your device is managed by an organization, make sure app installation is permitted.
Sandbox Merchant Account
Section titled “Sandbox Merchant Account”Use the shared Quickstart sandbox setup to create and test with a sandbox merchant account before integrating the iOS SDK.
Compatibility
Section titled “Compatibility”- The SDK supports all device orientations on iPad and portrait on iPhone. Feel free to support other orientations on iPhone but please keep in mind that the SDK’s UI will be presented in portrait on iPhone. See
UISupportedInterfaceOrientationsin the sample app’sInfo.plistor the “General” tab in Xcode’s Target Editor.
Match Affiliate Key to App Bundle ID
Section titled “Match Affiliate Key to App Bundle ID”iOS SDK uses the Affiliate Key from your merchant account to authenticate your app.
- Log in to SumUp with your merchant account and open the Developer Settings(Opens in a new tab) page.
- Create an Affiliate Key if you don’t have one yet.
- Add your app’s Bundle ID in the SumUp portal’s Application ID field. This way, your app will be able to call SumUp APIs, which require the Affiliate Key.
Add Property List Keys to Project
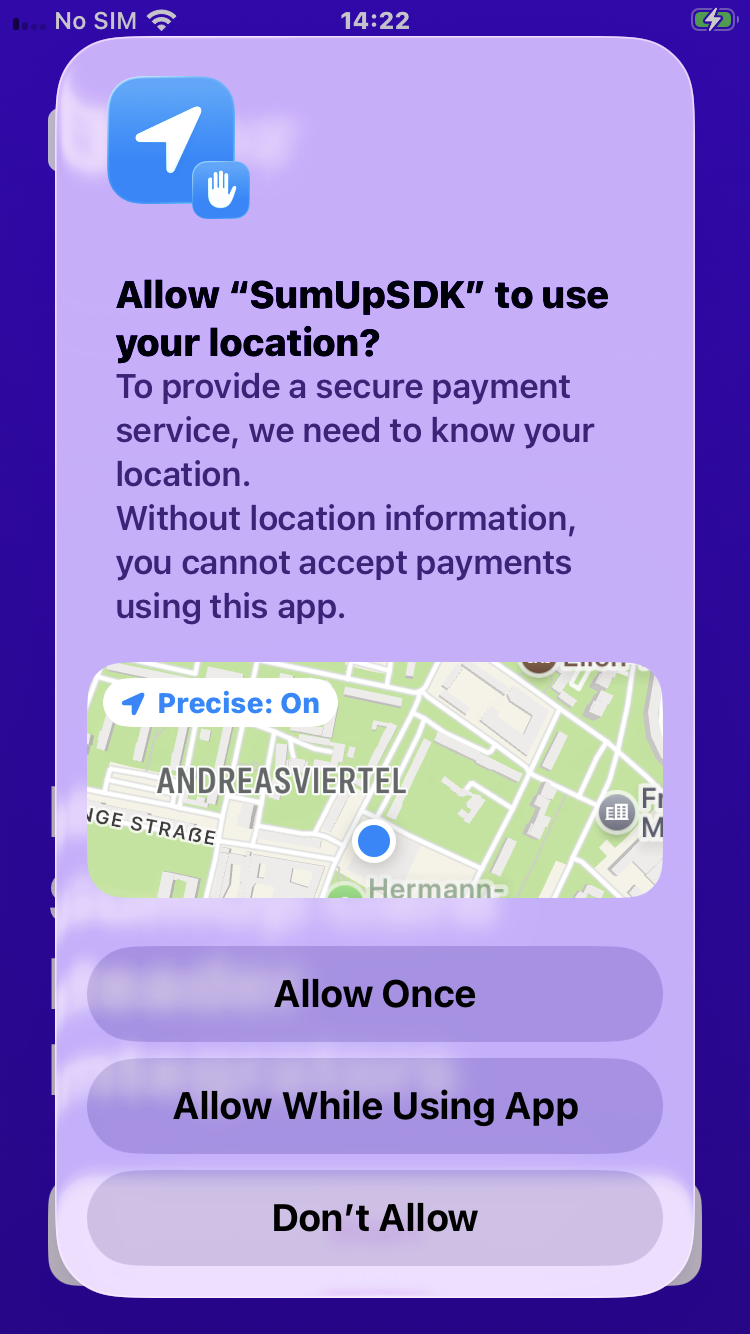
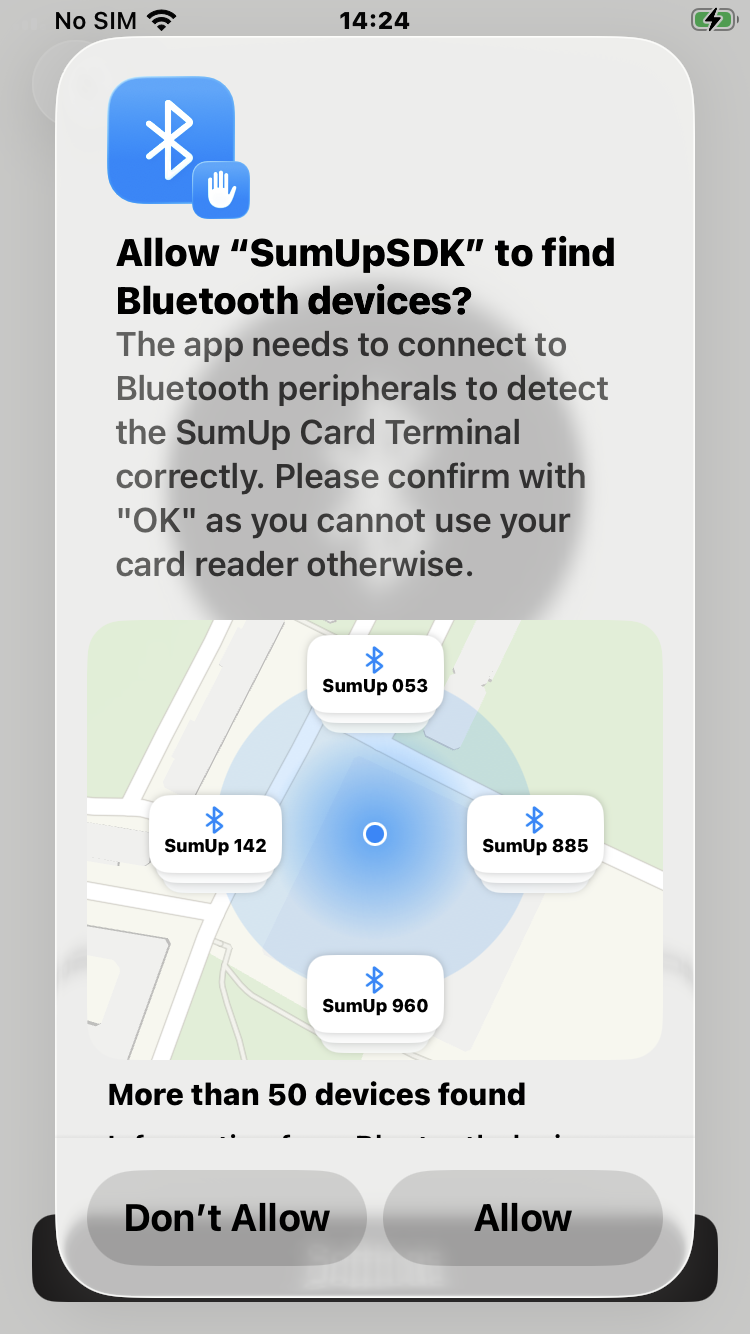
Section titled “Add Property List Keys to Project”The SumUp iOS SDK requires access to the user’s location and Bluetooth peripherals. If your app has not asked for the user’s permission, the SumUp iOS SDK will ask at the time of the first login or checkout attempt.
Please add the following keys to your info.plist file and set some values:
NSLocationWhenInUseUsageDescriptionNSBluetoothAlwaysUsageDescriptionCheck the Sample App property list(Opens in a new tab) for reference.
Location Services Requirement
Section titled “Location Services Requirement”Fast-Track Implementation
Section titled “Fast-Track Implementation”If you want to dive straight into implementation, carry out the following steps:
Card Reader Flow
Section titled “Card Reader Flow”- Install the SDK.
- Import the SDK into your project file.
- Initialize the SDK with an Affiliate Key.
- Log the user in.
- Prepare user’s device for checkout.
- Allow the user to select a card reader.
- Finally, implement the full checkout.
Tap to Pay Flow
Section titled “Tap to Pay Flow”Apple reviews Tap to Pay on iPhone apps with high scrutiny, and the entitlement must be granted before you can build. Read Apple’s Requirements for Tap to Pay on iPhone before you start, so that you do not discover a blocking requirement at submission time.
- Install the SDK.
- Import the SDK into your project file.
- Initialize the SDK with an Affiliate Key.
- Log the user in.
- Follow steps under Implementing Tap to Pay.
Integrating iOS SDK
Section titled “Integrating iOS SDK”Adding SDK Framework to Project
Section titled “Adding SDK Framework to Project”The SumUp iOS SDK is provided as an XCFramework SumUpSDK.xcframework that contains
the headers and bundles containing resources such as images and localizations. You can add the SDK binary manually or use a package manager such as Swift Package Manager or Cocoapods.
Please follow the relevant instructions below to prepare your project:
The latest Swift Package Manager version added support to distribute binary frameworks as Swift Packages(Opens in a new tab).
Follow this workaround to manage SumUp iOS SDK versions via Swift PM in those cases:
- Add the package dependency to the repository
https://github.com/sumup/sumup-ios-sdk(File > Swift Packages > Add Package Dependency…) with the versionUp to Next Major: 7.1.0 - Leave the checkbox unchecked for the SumUpSDK at the integration popup (Add Package to …:)
- From the Project Navigator, drag and drop the
SumUpSDK/Referenced Binaries/SumUpSDK.xcframeworkto your Xcode project’s “Frameworks, Libraries, and Embedded Content” on the General settings tab. - Make sure the required Info.plist keys are present.
To learn more about adding Swift Package dependencies, please refer to the official documentation(Opens in a new tab).
- Drag and drop the
SumUpSDK.xcframeworkto your Xcode project’s “Frameworks, Libraries, and Embedded Content” on the project General Settings tab. - Make sure the required Info.plist keys are present.
target '<Your Target Name>' do pod 'SumUpSDK', '~> 7.1.0'endImporting SDK
Section titled “Importing SDK”To import the SDK in Objective-C source files, you can use #import <SumUpSDK/SumUpSDK.h>. If module
support is enabled in your project, you can use @import SumUpSDK; instead.
In Swift, use import SumUpSDK. You do not have to add any headers to your bridging header.
Initialization
Section titled “Initialization”Before calling any additional feature of the SumUp iOS SDK, you are required to set up the SDK with your Affiliate Key. Call on the main thread. You may wish to defer calling setupWithAffiliateKey: until after app launch, as it requests the user’s location permission.
import SumUpSDKimport UIKit
@mainclass AppDelegate: UIResponder, UIApplicationDelegate { var window: UIWindow?
func application(_ application: UIApplication, didFinishLaunchingWithOptions launchOptions: [UIApplication.LaunchOptionsKey: Any]?) -> Bool {
/* * This will setup the SumUpSDK. * * You might consider moving this to a later point in your application's lifecycle, * as this will start updating for locations. * * Also remember to provide the necessary usage descriptions in your info.plist * and to properly localize it, see the * Add Property List Keys to Project section. * * Ensure to add the Bundle Identifier of your iOS app to your * Affiliate Key's Application identifiers in the SumUp developer portal. */ SumUpSDK.setup(affiliateKey: "sup_afk_abcqwerty") return true }
}#import "SUSAppDelegate.h"#import <SumUpSDK/SumUpSDK.h>
@implementation SUSAppDelegate
- (BOOL)application:(UIApplication *)application didFinishLaunchingWithOptions:(NSDictionary *)launchOptions { /* * This will setup the SumUpSDK. * * You might consider moving this to a later point in your application's lifecycle, * as this will start updating for locations. * * Also remember to provide the necessary usage descriptions in your info.plist * and to properly localize it, see the * Add Property List Keys to Project section. * * Ensure to add the Bundle Identifier of your iOS app to your * Affiliate Key's Application identifiers in the SumUp developer portal. */ [SMPSumUpSDK setupWithAffiliateKey:@"sup_afk_abcqwerty"]; return YES;}Authentication - Component Definitions
Section titled “Authentication - Component Definitions”SumUp iOS SDK supports either the OAuth 2.0 Authorization Code Flow login with Access Token or a modally presented login from a View Controller (as you can see implemented in the Sample App). We strongly recommend the OAuth 2.0 approach for new integrations, due to support for MFA, better overall security, and possible deprecation of the View Controller in the future.
/** * Logs in a merchant with an access token acquired via /tools/authorization/oauth/. * You must implement the "Authorization code flow", the "Client credentials flow" is not supported. * Make sure that no user is logged in already when calling this method. * * @param aToken a user-scoped access token * @param block a completion block that will run after login has succeeded/failed */+ (void)loginWithToken:(NSString *)aToken completion:(nullable SMPCompletionBlock)block;/** * Presents the login modally from the given view controller. * * The login is automatically dismissed if login was successful or cancelled by the user. * If error is nil and success is NO, the user cancelled the login. * Errors are handled internally and usually do not need any display to the user. * Does nothing if merchant is already logged in (calls completion block with success=NO, error=nil). * * @param fromViewController The UIViewController instance from which the login should be presented modally. * @param animated Pass YES to animate the transition. * @param block The completion block is called after each login attempt. */+ (void)presentLoginFromViewController:(UIViewController *)fromViewController animated:(BOOL)animated completionBlock:(nullable SMPCompletionBlock)block;/** * Performs a logout of the current merchant and resets the remembered password. * * @param block The completion block is called once the logout has finished. */+ (void)logoutWithCompletionBlock:(nullable SMPCompletionBlock)block;Implementing Authentication with OAuth 2.0
Section titled “Implementing Authentication with OAuth 2.0”SumUp can issue Access Tokens in accordance with the OAuth 2.0 Authorization Code Flow, which is our recommended authorization approach (Client Credentials Flow is not supported by this SDK). See the Authorization Documentation for more details.
Implementing Authentication with View Controller
Section titled “Implementing Authentication with View Controller”If you want to use the View Controller embedded in the SDK, this section explains how to do it. Please note that OAuth 2.0 Authorization Code Flow is supported and recommended, and the View Controller may become deprecated in the future.
Logging the User In
Section titled “Logging the User In”Following app authentication, a registered SumUp merchant account needs to be logged in. Present a login screen from your UIViewController:
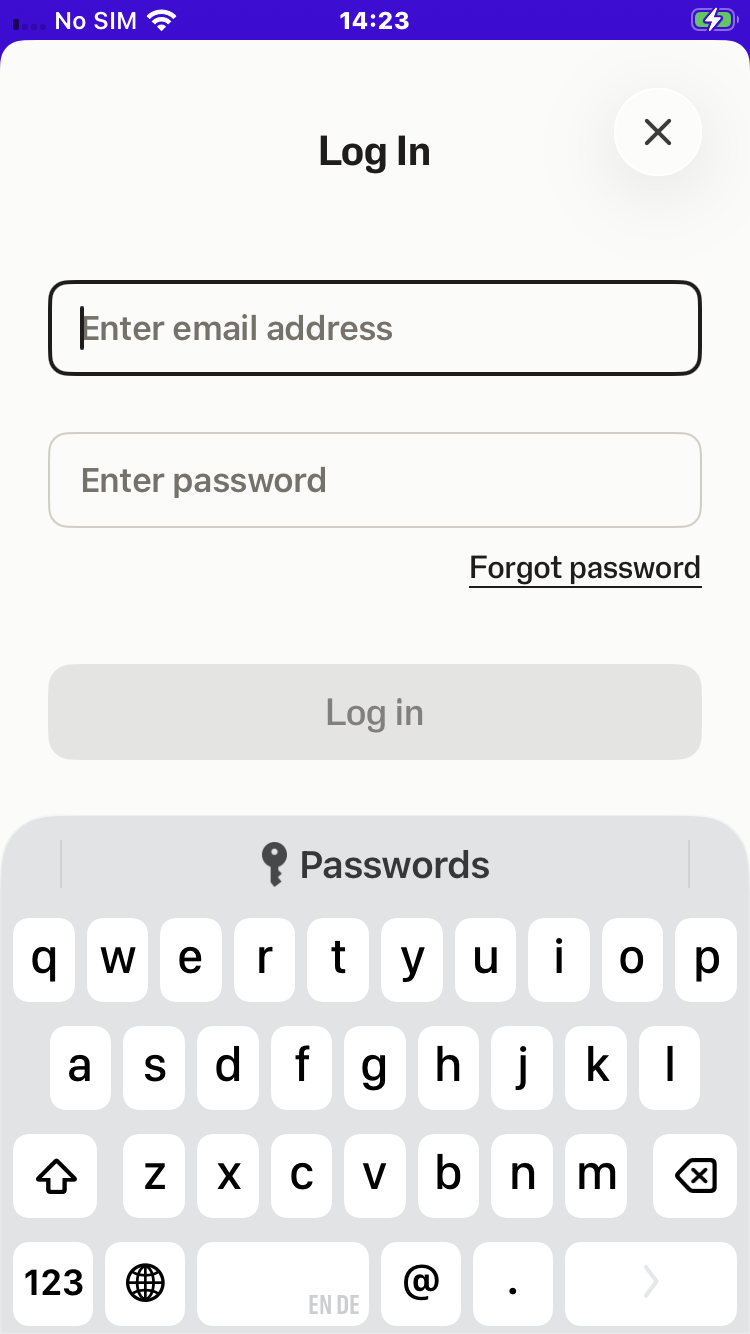
private func presentLogin() { // present login UI and wait for completion block to update button states SumUpSDK.presentLogin(from: self, animated: true) { [weak self] (success: Bool, error: Error?) in print("Did present login with success: \(success). Error: \(String(describing: error))")
guard error == nil else { // errors are handled within the SDK, there should be no need // for your app to display any error message return }
self?.updateCurrency() self?.updateButtonStates() }}- (IBAction)buttonLoginTapped:(id)sender { [SMPSumUpSDK presentLoginFromViewController:self animated:YES completionBlock:^(BOOL success, NSError *error) { if (error) { // errors are handled within the SDK, there should be no need // for your app to display any error message }
[self updateButtonState]; }];}Logging the User Out
Section titled “Logging the User Out”Similarly, you can log the user out.
fileprivate func requestLogout() { SumUpSDK.logout { [weak self] (success: Bool, error: Error?) in print("Did log out with success: \(success). Error: \(String(describing: error))") self?.updateButtonStates() }}- (IBAction)buttonLogoutTapped:(id)sender { [SMPSumUpSDK logoutWithCompletionBlock:^(BOOL success, NSError *error) { [self updateButtonState]; }];}Payment Checkout Definitions
Section titled “Payment Checkout Definitions”- In order to prepare a SumUp card terminal for checkout,
prepareForCheckoutcan be called in advance. A registered SumUp merchant account needs to be logged in, and the card terminal must already be setup. You should use this method to let the SDK know that the user is most likely starting a checkout attempt soon; for example when entering an amount or adding products to a shopping cart. This allows the SDK to take appropriate measures, like attempting to wake a connected card terminal. - When logged in you can let merchants check and update their card reader settings. Merchants can select their preferred card terminal and set up a new one if needed. The preferences available to a merchant depend on their respective account settings.
- Present Checkout View is the main checkout request definition.
Check these methods and included comments before moving on to implementation below.
/** * Can be called in advance when a checkout is imminent and a user is logged in. * You should use this method to let the SDK know that the user is most likely starting a * checkout attempt soon, e.g. when entering an amount or adding products to a shopping cart. * This allows the SDK to take appropriate measures, like attempting to wake a connected card terminal. */+ (void)prepareForCheckout;
/** * Call in advance when you know that checkout will occur for the logged-in user. * * Functionally the same as prepareForCheckout. * This version provides the option of supplying a SMPCompletionBlock where you can * dismiss custom UI, check the reader status or perform a checkout. * * @param block The block is called at the end of the preparation after asking the reader to wake. */+ (void)prepareForCheckout:(nullable SMPCompletionBlock)block;/** * Presenting card reader settings allows the current merchant to switch to a different * card reader, view general information about the current card reader, and connect to it. * Can only be called when a merchant is logged in and checkout is not in progress. * The completion block will be executed once the screen has been dismissed. * If not successful an error will be provided, see SMPSumUpSDKError. * * @param fromViewController The UIViewController instance from which the checkout should be presented modally. * @param animated Pass YES to animate the transition. * @param block The completion block is called after the view controller has been dismissed. */+ (void)presentCardReaderSettingsFromViewController:(UIViewController *)fromViewController animated:(BOOL)animated completion:(nullable SMPCompletionBlock)block;/** * Presents a checkout view with all necessary steps to charge a customer. * * @param request The SMPCheckoutRequest encapsulates all transaction relevant data such as total amount, label, etc. * @param controller The UIViewController instance from which the checkout should be presented modally. * @param block The completion block will be called when the view will be dismissed. */+ (void)checkoutWithRequest:(SMPCheckoutRequest *)request fromViewController:(UIViewController *)controller completion:(nullable SMPCheckoutCompletionBlock)block;Adding Payment Checkout View
Section titled “Adding Payment Checkout View”In this step, we implement the payment checkout.
Prepare for Checkout
Section titled “Prepare for Checkout”- (BOOL)textFieldShouldReturn:(UITextField *)textField { if (textField == self.textFieldTotal) { // we assume a checkout is imminent // let the SDK know to e.g. wake a connected terminal [SMPSumUpSDK prepareForCheckout];
[self.textFieldTitle becomeFirstResponder]; } else if ([SMPSumUpSDK isLoggedIn]) { [self buttonChargeTapped:nil]; } else { [textField resignFirstResponder]; }
return YES;}extension ViewController: UITextFieldDelegate { func textFieldShouldReturn(_ textField: UITextField) -> Bool { if textField == textFieldTotal { // we assume a checkout is imminent // let the SDK know to e.g. wake a connected terminal SumUpSDK.prepareForCheckout()
textFieldTitle?.becomeFirstResponder() } else if SumUpSDK.isLoggedIn { requestCheckout() } else { textField.resignFirstResponder() }
return true }}A variant of prepareForCheckout accepts a completion block, called after the SDK has asked the reader to wake. Use it to check reader status or proceed straight to checkout:
SumUpSDK.prepareForCheckout { (success: Bool, error: Error?) in guard success, let status = SumUpSDK.lastReaderStatus, status.isActive else { // reader did not wake — handle accordingly return } // reader is active, proceed to checkout}[SMPSumUpSDK prepareForCheckout:^(BOOL success, NSError * _Nullable error) { if (!success) { // reader did not wake — handle accordingly return; }
SMPReaderStatus *status = SMPSumUpSDK.lastReaderStatus; if (status.isActive) { // reader is active, proceed to checkout }}];Present Card Reader Settings
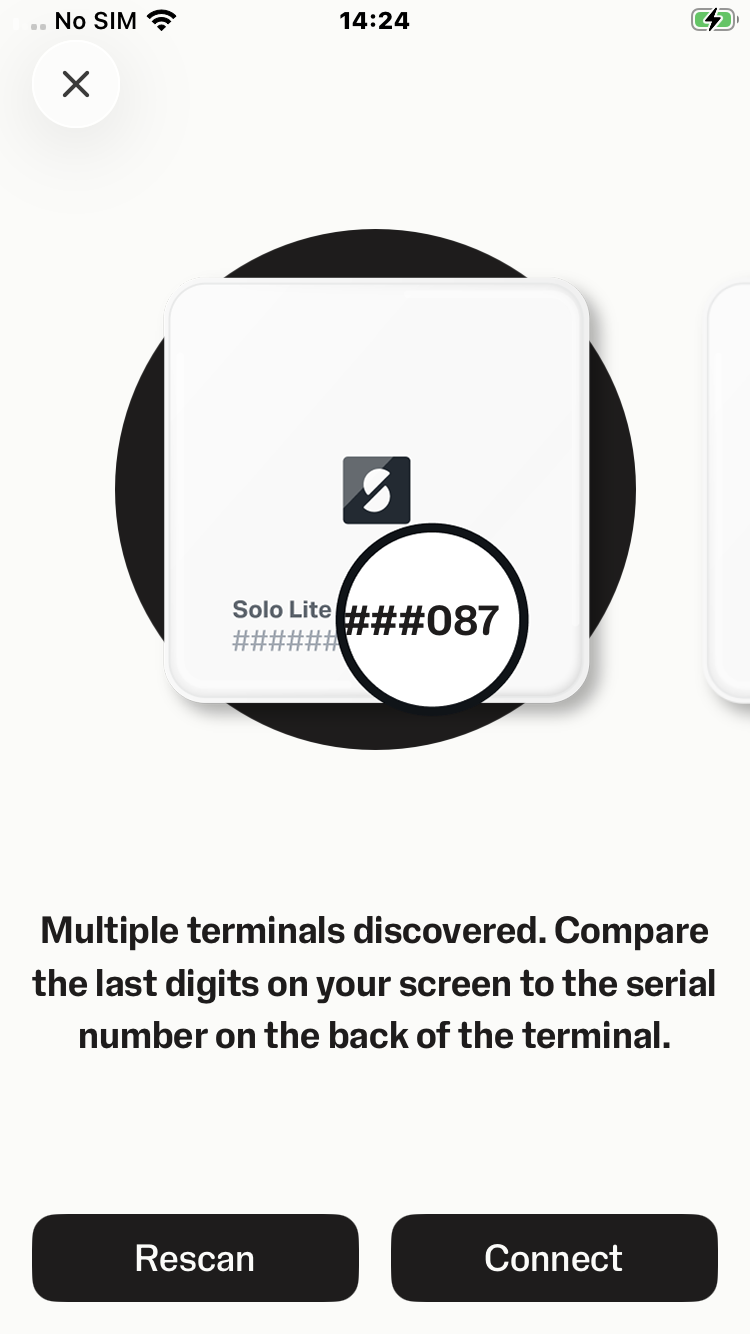
Section titled “Present Card Reader Settings”Provides the user a way to search for nearby Bluetooth card readers and select one to be used. The selected card reader will be saved to UserDefaults and used for subsequent checkouts. Using this screen is optional. If a checkout is started but no card reader has been saved, the checkout itself will automatically present the screen to search for and select a card reader, and this will be saved for next time.
private func presentCardReaderSettings() { SumUpSDK.presentCardReaderSettings(from: self, animated: true) { [weak self] (success: Bool, presentationError: Error?) in print("Did present checkout preferences with success: \(success). Error: \(String(describing: presentationError))")
guard let safeError = presentationError as NSError? else { // no error, nothing else to do return }
print("error presenting checkout preferences: \(safeError)")
let errorMessage: String switch (safeError.domain, safeError.code) { case (SumUpSDKErrorDomain, SumUpSDKError.accountNotLoggedIn.rawValue): errorMessage = "not logged in"
case (SumUpSDKErrorDomain, SumUpSDKError.checkoutInProgress.rawValue): errorMessage = "checkout is in progress"
default: errorMessage = "general error" }
self?.showResult(string: errorMessage) }}- (IBAction)buttonOpenPreferencesTapped:(id)sender { [SMPSumUpSDK presentCardReaderSettingsFromViewController:self animated:YES completion:^(BOOL success, NSError *_Nullable error) { if (!success || error) { [self showResultsString:@"not logged in"]; } }];}Reader Status
Section titled “Reader Status”The lastReaderStatus class property returns the most recently reported information about a saved or connected card reader. It returns nil if the merchant is not logged in or no reader has been connected and saved.
The returned SMPReaderStatus object exposes:
batteryLevel— last reported battery level (updated during pairing or transaction processing; freshness varies with reader usage).serialNumber— the serial number printed on the back of the physical reader.readerType— the reader model (SMPReaderType/ReaderType): Unknown, Pin Plus (incl. Pin Plus Contactless), 3G, Air (incl. Air Lite), Solo, Solo Lite. Returns Unknown if no reader has ever been connected, which is the expected value for Tap to Pay on iPhone-only integrations.isActive—YESwhen the reader is currently active or becoming active (e.g. after callingprepareForCheckout:). ReturnsNOif no reader has been connected or the saved reader is currently disconnected.
if let status = SumUpSDK.lastReaderStatus { print("Reader: \(status.serialNumber), active: \(status.isActive), battery: \(status.batteryLevel)%")}SMPReaderStatus *status = SMPSumUpSDK.lastReaderStatus;if (status) { NSLog(@"Reader: %@, active: %d, battery: %lu%%", status.serialNumber, status.isActive, (unsigned long)status.batteryLevel);}Present Checkout View
Section titled “Present Checkout View”Prepare a checkout request that encapsulates the information regarding the transaction.
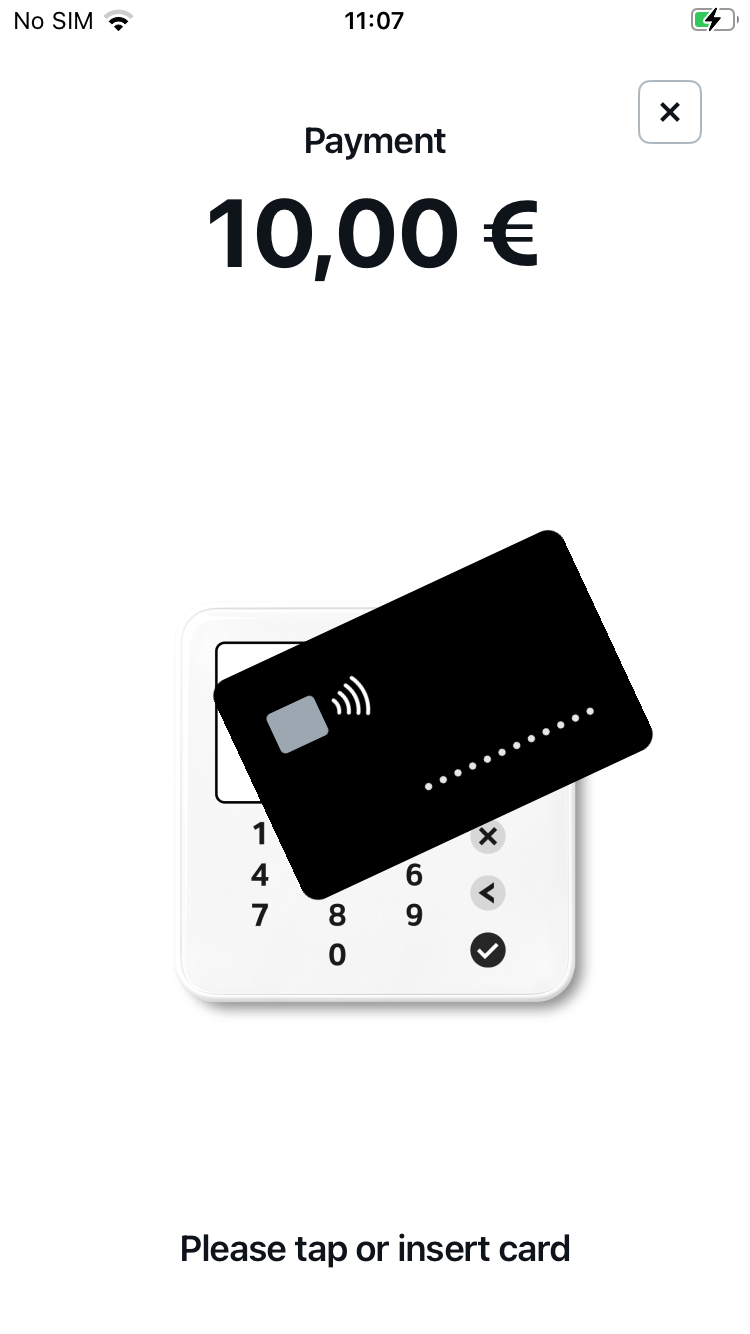
SumUpSDK.checkout(with: request, from: self) { [weak self] (result: CheckoutResult?, error: Error?) in if let safeError = error as NSError? { print("error during checkout: \(safeError)")
if (safeError.domain == SumUpSDKErrorDomain) && (safeError.code == SumUpSDKError.accountNotLoggedIn.rawValue) { self?.showResult(string: "not logged in") } else { self?.showResult(string: "general error") }
return }[SMPSumUpSDK checkoutWithRequest:request fromViewController:self completion:^(SMPCheckoutResult *result, NSError *error) { if ([error.domain isEqualToString:SMPSumUpSDKErrorDomain] && (error.code == SMPSumUpSDKErrorAccountNotLoggedIn)) { [self showResultsString:@"not logged in"]; return; }NS_SWIFT_NAME(SumUpSDKErrorDomain)extern NSString * const SMPSumUpSDKErrorDomain;/** * The error codes returned from the SDK */typedef NS_ENUM(NSInteger, SMPSumUpSDKError) { /// General error SMPSumUpSDKErrorGeneral = 0, /// The merchant's account is not activated SMPSumUpSDKErrorActivationNeeded = 1, /// General error with the merchant's account SMPSumUpSDKErrorAccountGeneral = 20, /// The merchant is not logged in to their account SMPSumUpSDKErrorAccountNotLoggedIn = 21, /// A merchant is logged in already. Call logout before logging in again. SMPSumUpSDKErrorAccountIsLoggedIn = 22, /// General checkout error SMPSumUpSDKErrorCheckoutGeneral = 50, /// Another checkout process is currently in progress. SMPSumUpSDKErrorCheckoutInProgress = 51, /// The currency code specified in the checkout request does not match that of the current merchant. SMPSumUpSDKErrorCheckoutCurrencyCodeMismatch = 52, /// The foreign transaction ID specified in the checkout request has already been used. SMPSumUpSDKErrorDuplicateForeignID = 53, /// The access token is invalid. Login to get a valid access token. SMPSumUpSDKErrorInvalidAccessToken = 54, /// The amount entered contains invalid number of decimals. SMPSumUpSDKErrorInvalidAmountDecimals = 55, /// The processAs property of CheckoutRequest is not valid SMPSumUpSDKErrorInvalidProcessAs = 56, /// The numberOfInstallments property of CheckoutRequest is not valid SMPSumUpSDKErrorInvalidNumberOfInstallments = 57, /// Reader wake error during Prepare for Checkout process. /// Includes when a reader has never been paired. SMPSumUpSDKErrorPrepareCheckoutReaderWakeFailed = 60, /// Tap to Pay on iPhone payment method is not available for the current merchant. This may be /// because the payment method is not available in their country. SMPSumUpSDKErrorTapToPayNotAvailable = 100, /// Tap to Pay on iPhone: activation is required. Call `presentTapToPayActivationFromViewController:animated:completionBlock:`. SMPSumUpSDKErrorTapToPayActivationNeeded = 101, /// Tap to Pay on iPhone: an unspecified error occurred SMPSumUpSDKErrorTapToPayInternalError = 102, /// Tap to Pay on iPhone requires an iPhone XS or later and does not work on iPads. SMPSumUpSDKErrorTapToPayMinHardwareNotMet = 103, /// Tap to Pay on iPhone requires a newer version of iOS; please check the documentation for the /// minimum supported version. SMPSumUpSDKErrorTapToPayiOSVersionTooOld = 104, /// Tap to Pay on iPhone has some other (unspecified) requirement(s) that are not met. SMPSumUpSDKErrorTapToPayRequirementsNotMet = 105,} NS_SWIFT_NAME(SumUpSDKError);public enum SumUpSDKError : Int, @unchecked Sendable { /// General error case general = 0
/// The merchant's account is not activated case activationNeeded = 1
/// General error with the merchant's account case accountGeneral = 20
/// The merchant is not logged in to their account case accountNotLoggedIn = 21
/// A merchant is logged in already. Call logout before logging in again. case accountIsLoggedIn = 22
/// General checkout error case checkoutGeneral = 50
/// Another checkout process is currently in progress. case checkoutInProgress = 51
/// The currency code specified in the checkout request does not match that of the current merchant. case checkoutCurrencyCodeMismatch = 52
/// The foreign transaction ID specified in the checkout request has already been used. case duplicateForeignID = 53
/// The access token is invalid. Login to get a valid access token. case invalidAccessToken = 54
/// The amount entered contains invalid number of decimals. case invalidAmountDecimals = 55
/// The processAs property of CheckoutRequest is not valid case invalidProcessAs = 56
/// The numberOfInstallments property of CheckoutRequest is not valid case invalidNumberOfInstallments = 57
/// Reader wake error during Prepare for Checkout process. /// Includes when a reader has never been paired. case prepareCheckoutReaderWakeFailed = 60
/// Tap to Pay on iPhone payment method is not available for the current merchant. This may be /// because the payment method is not available in their country. case tapToPayNotAvailable = 100
/// Tap to Pay on iPhone: activation is required. Call `presentTapToPayActivationFromViewController:animated:completionBlock:`. case tapToPayActivationNeeded = 101
/// Tap to Pay on iPhone: an unspecified error occurred case tapToPayInternalError = 102
/// Tap to Pay on iPhone requires an iPhone XS or later and does not work on iPads. case tapToPayMinHardwareNotMet = 103
/// Tap to Pay on iPhone requires a newer version of iOS; please check the documentation for the /// minimum supported version. case tapToPayiOSVersionTooOld = 104
/// Tap to Pay on iPhone has some other (unspecified) requirement(s) that are not met. case tapToPayRequirementsNotMet = 105}Handling Payment Checkout
Section titled “Handling Payment Checkout”Detailed information on the payment checkout.
Note on Tipping
Section titled “Note on Tipping”There are three modes for tipping:
-
No tipping. Leave
tipAmountset to nil when creating theSMPCheckoutRequestobject. -
Programmatic tipping via the
tipAmountproperty. Ask the user in your own UI for an appropriate tip amount and then set thetipAmountproperty onSMPCheckoutRequest. This will be added to the total amount, but will be displayed to the user separately during checkout. -
Tip on Card Reader. TCR prompts the customer directly on the card reader’s display for a tip amount, rather than prompting for a tip amount on the iPhone or iPad display.
Definitions
Section titled “Definitions”You have an option to add the paymentMethod to checkout request, or skip it and let it default to Card Reader payment, as shown in the examples below. You can also familiarize yourself with the payment properties before moving on to implementation.
SMPPaymentMethod selects how the transaction is taken:
| Objective-C | Swift | Value | Description |
|---|---|---|---|
SMPPaymentMethodCardReader |
.cardReader |
0 | A Bluetooth-connected SumUp card terminal. This is the default. |
SMPPaymentMethodTapToPay |
.tapToPay |
1 | Tap to Pay on iPhone, using the iPhone itself as the reader. See Implementing Tap to Pay. |
/** * Creates a new checkout request. * * Be careful when creating the NSDecimalNumber to not falsely use the NSNumber class creator methods. * * @param totalAmount The total amount to be charged to a customer. Cannot be nil. * @param title An optional title to be displayed in the merchant's history and on customer receipts. * @param currencyCode Currency Code in which the total should be charged (ISO 4217 code, see SMPCurrencyCode). Cannot be nil, has to match the currency of the merchant logged in. Use [[[SMPSumUpSDK currentMerchant] currencyCode] and ensure its length is not 0. * * @return A new request object or nil if totalAmount or currencyCode are nil. */+ (SMPCheckoutRequest *)requestWithTotal:(NSDecimalNumber *)totalAmount title:(nullable NSString *)title currencyCode:(NSString *)currencyCode paymentMethod:(SMPPaymentMethod)paymentMethod;/** * Creates a new checkout request using a card reader as the method of payment. * * Be careful when creating the NSDecimalNumber to not falsely use the NSNumber class creator methods. * * @param totalAmount The total amount to be charged to a customer. Cannot be nil. * @param title An optional title to be displayed in the merchant's history and on customer receipts. * @param currencyCode Currency Code in which the total should be charged (ISO 4217 code, see SMPCurrencyCode). Cannot be nil, has to match the currency of the merchant logged in. Use [[[SMPSumUpSDK currentMerchant] currencyCode] and ensure its length is not 0. * * @return A new request object or nil if totalAmount or currencyCode are nil. */+ (SMPCheckoutRequest *)requestWithTotal:(NSDecimalNumber *)totalAmount title:(nullable NSString *)title currencyCode:(NSString *)currencyCode;/** * The total amount to be charged to a customer. */@property (nonatomic, strong, readonly, nullable) NSDecimalNumber *totalAmount;
/// A title to be displayed in the merchant's history and on customer receipts.@property (nonatomic, strong, readonly, nullable) NSString *title;
/** * Currency code in which the total should be charged (ISO 4217 code, see SMPCurrencyCode). */@property (nonatomic, strong, readonly, nullable) NSString *currencyCode;
/** * An (optional) ID to be associated with this transaction. * See: * https://docs.sumup.com/rest-api/#tag/Transactions * * on how to retrieve a transaction using this ID. * * This ID has to be unique in the scope of a SumUp merchant account and its sub-accounts. * It must not be longer than 128 characters and can only contain printable ASCII characters. */@property (nonatomic, copy, nullable) NSString *foreignTransactionID;
/** * An optional additional tip amount to be charged to a customer. * * @note This property will be ignored if the connected card reader supports the * Tip-on-Card Reader (TCR) feature and if it is enabled by setting tipOnCardReaderIfAvailable to * YES. * * Important: The customer may use a reader that does not support TCR. You must handle this * case yourself in order to avoid no tip from being prompted. * * To do this: * * Before calling SMPSumUpSDK checkoutWithRequest:fromViewController:completion:, * check SMPSumUpSDK.isTipOnCardReaderAvailable: * * - If NO, you should prompt the user for a tip amount yourself and set tipAmount * - If YES, you may set tipOnCardReaderIfAvailable to YES. * Do not prompt the user for a tip amount or set tipAmount if you do this. * * Will be added to the totalAmount. Must be greater than zero if set. */@property (nonatomic, copy, nullable) NSDecimalNumber *tipAmount;
/** * Optional list of suggested tip percentages shown during checkout. * * Values are interpreted as whole-number percentages, for example, 15.33 is treated as 15%. * Negative values are also ignored. * * The SDK evaluates only the first 3 elements provided in the array. Within this subset, any * values that are duplicates or fall outside the 1-100 range are ignored. * * If the property is not set, or if the processed subset contains no valid values, the SDK reverts * to the default suggestions: 10%, 15%, 20%. * * Note: Valid values are automatically displayed in ascending order. * * The "No Tip" option is always shown and is not part of this list. * * In Tip-on-Card Reader (TCR) mode, fewer than 3 values may be displayed * depending on hardware support. */@property (nonatomic, copy, nullable) NSArray<NSNumber *> *customTipRates;
/** * Enables Tip-on-Card Reader (TCR), if the feature is available. * * @note TCR prompts the customer directly on the card reader's display for a tip amount, rather * than prompting for a tip amount on the iPhone or iPad display. * * Not all card readers support this feature. To find out if the feature is supported for the last-used * card reader, check SMPSumUpSDK.isTipOnCardReaderAvailable. * * Setting this property to YES when the feature is not available will do nothing. */@property (nonatomic, assign) BOOL tipOnCardReaderIfAvailable;
/** * An optional count for the display of the number of sale items throughout the checkout process. * * Default is zero which will hide the display of the item count. * * This value is currently not reflected in the merchant's history or the customer receipts. */@property (nonatomic, assign) NSUInteger saleItemsCount;
/** * An optional flag to skip the confirmation screen in checkout. * If set, the checkout will be dismissed w/o user interaction. * * Default is SMPSkipScreenOptionNone. */@property (nonatomic, assign) SMPSkipScreenOptions skipScreenOptions;
/** * The method of payment to use during checkout; for example, a bluetooth-connected card * reader, or Tap to Pay on iPhone. * * Defaults to `SMPPaymentMethodCardReader`. */@property (nonatomic, assign) SMPPaymentMethod paymentMethod;
/** * Some cards contain multiple applications. Use `processAs` to allow the customer to * control which application is used to process the transaction, e.g. credit or debit. * * To do this, display a UI that asks the user to select either Credit or Debit. * If they choose Credit, there should also be a way for them to enter the number of * installments, which you should assign to `numberOfInstallments` * * Warning: The transaction will fail if `isProcessAsRequired` on `SMPSumUpSDK` is `YES` but `processAs` is * `SMPProcessAsNotSet`. * * Defaults to `SMPProcessAsNotSet`. */@property (nonatomic, assign) SMPProcessAs processAs;
/** * Some markets allow the customer to pay in installments. Ignored unless `processAs` is set to `SMPProcessAsCredit`. */@property (nonatomic, assign) NSInteger numberOfInstallments;
/** * Automatically close the checkout if the user stops on the Send Receipt screen without manually dismissing it. * This can be useful for kiosk environments where users might walk away without manually closing the Send Receipt screen. * * If the user starts entering a phone number or email address on the Send Receipt screen, this duration will automatically * increase to 60 seconds after the last edit is made. * * If set to 0.0, the Send Receipt screen remains on-screen forever or until the user dismisses it. */@property (nonatomic, assign) NSTimeInterval successScreenTimeout;Implement Full Checkout
Section titled “Implement Full Checkout”In this step, we implement the checkout.
- Verify that Merchant is logged in and using a valid currency code.
- Define total amount to be charged. Please note that you need to pass an
NSDecimalNumberas the total value. WhileNSDecimalNumberis a subclass ofNSNumberit is not advised to use the convenience method ofNSNumberto create anNSDecimalNumber. - Set up the request.
- Add a tip if selected (see the section about tipping).
- Check if the option to skip receipt is enabled, if so, execute it.
- Check for
foreignTransactionID. - Execute the request with error handling and confirmation.
- Verify that the checkout started correctly.
fileprivate func requestCheckout() { // ensure that we have a valid merchant guard let merchantCurrencyCode = SumUpSDK.currentMerchant?.currencyCode else { showResult(string: "not logged in") return }
guard let totalText = textFieldTotal?.text else { return }
// create an NSDecimalNumber from the totalText // please be aware to not use NSDecimalNumber initializers inherited from NSNumber let total = NSDecimalNumber(string: totalText) guard total != NSDecimalNumber.zero else { return }
// setup payment request let request = CheckoutRequest(total: total, title: textFieldTitle?.text, currencyCode: merchantCurrencyCode)
// add tip if selected if let selectedTip = segmentedControlTipping?.selectedSegmentIndex, selectedTip > 0, tipAmounts.indices ~= selectedTip { let tipAmount = tipAmounts[selectedTip] request.tipAmount = tipAmount }
// set screenOptions to skip if switch is set to on if let skip = switchSkipReceiptScreen?.isOn, skip { request.skipScreenOptions = .success }
// the foreignTransactionID is an **optional** parameter and can be used // to retrieve a transaction from SumUp's API. See -[SMPCheckoutRequest foreignTransactionID] request.foreignTransactionID = "your-unique-identifier-\(ProcessInfo.processInfo.globallyUniqueString)"
SumUpSDK.checkout(with: request, from: self) { [weak self] (result: CheckoutResult?, error: Error?) in if let safeError = error as NSError? { print("error during checkout: \(safeError)")
if (safeError.domain == SumUpSDKErrorDomain) && (safeError.code == SumUpSDKError.accountNotLoggedIn.rawValue) { self?.showResult(string: "not logged in") } else { self?.showResult(string: "general error") }
return }
guard let safeResult = result else { print("no error and no result should not happen") return }
print("result_transaction==\(String(describing: safeResult.transactionCode))")
if safeResult.success { print("success") var message = "Thank you - \(String(describing: safeResult.transactionCode))"
if let info = safeResult.additionalInfo, let tipAmount = info["tip_amount"] as? Double, tipAmount > 0, let currencyCode = info["currency"] as? String { message = message.appending("\ntip: \(tipAmount) \(currencyCode)") }
self?.showResult(string: message) } else { print("cancelled: no error, no success") self?.showResult(string: "No charge (cancelled)") } }
// after the checkout is initiated we expect a checkout to be in progress if !SumUpSDK.checkoutInProgress { // something went wrong: checkout was not started showResult(string: "failed to start checkout") }}- (IBAction)buttonChargeTapped:(id)sender { // check total and currency code NSString *total = [[self textFieldTotal] text]; NSString *currencyCode = [[SMPSumUpSDK currentMerchant] currencyCode];
if (([total doubleValue] <= 0) || ![currencyCode length]) { [self showResultsString:@"not logged in"]; return; }
SMPCheckoutRequest *request;
request = [SMPCheckoutRequest requestWithTotal:[NSDecimalNumber decimalNumberWithString:total] title:self.textFieldTitle.text currencyCode:currencyCode];
// Tip is optional. Default is no tip. NSInteger selectedTipSegment = self.segmentedControlTipping.selectedSegmentIndex;
if (selectedTipSegment > 0) { [request setTipAmount:[[self tipAmounts] objectAtIndex:selectedTipSegment]]; }
// Skip receipt screen if toggle is set to on if (self.switchSkipReceiptScreen.isOn) { [request setSkipScreenOptions:SMPSkipScreenOptionSuccess]; }
// the foreignTransactionID is an optional parameter and can be used // to retrieve a transaction from SumUp's API. See -[SMPCheckoutRequest foreignTransactionID] [request setForeignTransactionID:[NSString stringWithFormat:@"your-unique-identifier-%@", [[NSProcessInfo processInfo] globallyUniqueString]]];
[SMPSumUpSDK checkoutWithRequest:request fromViewController:self completion:^(SMPCheckoutResult *result, NSError *error) { if ([error.domain isEqualToString:SMPSumUpSDKErrorDomain] && (error.code == SMPSumUpSDKErrorAccountNotLoggedIn)) { [self showResultsString:@"not logged in"]; return; }
NSMutableArray<NSString *> *strings = [NSMutableArray array]; [strings addObject:[NSString stringWithFormat:@"%@ - %@", result.success ? @"Thank you" : @"No charge", result.transactionCode ? : @"no transaction"]];
if (result.transactionCode) { // get optional tip amount NSNumber *tipAmount = result.additionalInfo[@"tip_amount"];
// display tip only if greater than zero if ([tipAmount isKindOfClass:[NSNumber class]] && (tipAmount.doubleValue > 0)) { [strings addObject:[NSString stringWithFormat:@"%@ (incl. %@ tip) %@", result.additionalInfo[@"amount"], tipAmount, result.additionalInfo[@"currency"]]]; } else { [strings addObject:[NSString stringWithFormat:@"%@ %@ (no tip)", result.additionalInfo[@"amount"], result.additionalInfo[@"currency"]]]; } }
[self showResultsString:[strings componentsJoinedByString:@"\n"]];
if (result.success) { [self.textFieldTitle setText:nil]; } }];
// something went wrong checkout was not started if (![SMPSumUpSDK checkoutInProgress]) { [self showResultsString:@"failed to start checkout"]; }}Credit/Debit Selection (processAs Property)
Section titled “Credit/Debit Selection (processAs Property)”Some countries require the customer to select Credit or Debit at the beginning of the checkout. This is because a payment card may contain multiple applications linked with different accounts, making it necessary for the customer to specify which application should be used to process the transaction.
For countries that do not require credit/debit selection, you can set the processAs property of SMPCheckoutRequest to SMPProcessAsNotSet.
To tell if the current country requires processAs to be set to a value other than SMPProcessAsNotSet, check SMPSumUpSDK.isProcessAsRequired.
If needed, your app should set the processAs property of SMPCheckoutRequest to SMPProcessAsCredit or SMPProcessAsDebit after showing its own UI that prompts the customer to select Credit or Debit.
SDK 6.0 and earlier presented two screens during the checkout that prompted the user to select Credit or Debit, and if Credit, to also choose the number of installments. This behavior was previously available via SMPProcessAsPromptUser.
Installments
Section titled “Installments”When SMPProcessAsCredit is used, you should obtain the number of installments from the customer using your own UI. Assign the positive, non-zero value to numberOfInstallments on SMPCheckoutRequest.
Apple’s Requirements for Tap to Pay on iPhone
Section titled “Apple’s Requirements for Tap to Pay on iPhone”Apple reviews Tap to Pay on iPhone apps with more scrutiny than an ordinary App Store submission. Most delays are caused by requirements that are easy to overlook rather than by defects in the payment flow itself, so read this section before you submit.
SumUp does not approve Tap to Pay on iPhone apps — approval comes solely from Apple’s review team, and every requirement below is Apple’s. SumUp’s integration team can help if you get stuck, but the quickest route through review is to satisfy this list first.
Non-Negotiable Requirements
Section titled “Non-Negotiable Requirements”Each of the following is required. Confirm all of them before submitting.
- Hold the entitlement before you build. Request the Tap to Pay on iPhone entitlement from Apple
and wait for approval, then add
com.apple.developer.proximity-reader.payment.acceptanceto your app. See Apple’s guide to setting up the entitlement(Opens in a new tab). Approval is not immediate, so start this early. - Follow the Human Interface Guidelines for Tap to Pay on iPhone(Opens in a new tab). These are treated as requirements during review, not as suggestions.
- Follow Apple’s Tap to Pay marketing guidelines(Opens in a new tab) and use Apple’s standard assets wherever they are offered.
- Never alter the product name. Call
tapToPayProductNamerather than hardcoding a string. It returns the correctly localized name for every language the SDK supports, and it tracks any rebranding by Apple. - Never draw your own version of Apple’s payment UI. The card-reading and PIN entry screens belong to Apple, as described in the next section. Reimplementing, overlaying, restyling or obscuring them will fail review.
- Ship a runtime availability check, not a hardcoded one. Requirements move over time, so gate
the feature on
checkTapToPayAvailabilityand the Tap to Pay error codes instead of comparing against a fixed iOS version or device list.
What the SDK Provides and What You Must Build
Section titled “What the SDK Provides and What You Must Build”Apple’s review checklist covers the whole merchant experience, but the SumUp iOS SDK already implements most of it. Use the table below to work out which items are yours.
| Requirement | Provided by the SDK | What you need to do |
|---|---|---|
| Apple terms and conditions | Yes. Activation presents Apple’s account-linking sheet, and if the merchant has not yet accepted, the SDK presents it again during a checkout and retries the transaction. | Nothing. Do not build your own terms screen. |
| Merchant authorization | Partly. The SDK blocks activation on employee (sub-account) logins and explains that the main account owner must enable the feature first. | Make sure the merchant signing in is the account owner during first-time setup. |
| Unsupported device and iOS messaging | Yes. Activation shows an alert when the device model, iOS version or Apple’s own service does not meet the requirements. | Call checkTapToPayAvailability before you offer the feature so merchants never reach a dead end, and hide the entry point when it returns unavailable. |
| Live activation-status checks | Yes. checkTapToPayAvailability reports both availability and whether activation has already been completed, checked against Apple rather than cached indefinitely. |
Re-check on launch instead of persisting the result. Handle error 101 by running activation and retrying. |
| Initial configuration progress | Yes. The SDK shows a progress screen while the device is prepared, which can take 45 seconds or longer on first use. | Nothing, but do not put your own blocking UI on top of it. |
| Initializing and processing screens | Yes. The SDK’s checkout screen moves through initializing, processing and finalizing states. | Nothing. |
| Card-reading screen | Presented by Apple, not by SumUp. When Apple’s reader UI appears the SDK clears its own text and hides its animation. | Nothing, and nothing is possible — the SDK cannot alter or inspect this UI. |
| PIN entry | Presented by Apple, and requested by SumUp’s backend when a transaction needs it. | Nothing. Do not build a PIN pad. |
| Approved and declined outcomes | Yes. The SDK presents the outcome screen, with messaging supplied by SumUp’s backend. | Read SMPCheckoutResult in your completion handler and update your own order state. |
| Timeout outcomes | Handled as a declined payment. There is no separate timeout screen. | Treat a timeout as a failed transaction rather than expecting a distinct result. |
| Merchant education | Yes. Activation includes an introduction to the feature that shows the merchant how to take a payment. | Nothing. Calling presentTapToPayActivation again re-shows it, which is useful for a “How it works” menu item. |
| Digital receipts | Not part of the SDK. | Issue receipts through the Receipts API. |
Common Mistakes
Section titled “Common Mistakes”These account for most of the time integrators lose during review and integration.
- Testing on the Simulator. Tap to Pay on iPhone is compiled out for the Simulator and can never work there. Test on a physical iPhone XS or later.
- Testing with a Sandbox Apple ID. Debugging requires a non-Sandbox Apple ID, because a Sandbox Apple ID expects both Apple and SumUp to be running against test backends, which the SDK does not support. Use a SumUp sandbox merchant account to avoid moving real money instead.
- Submitting before the entitlement is granted. If the entitlement is missing or misconfigured,
presentTapToPayActivationfails with a misleadingFailed to show Terms of Servicealert. The cause is the entitlement, not the terms. - Activating on an employee account. A business using SumUp sub-accounts must enable the feature on the main account first, otherwise activation fails for every sub-account.
- Assuming a passcode is set. Apple requires a device passcode. Without one, activation fails with a requirements error rather than a passcode-specific one.
- Starting a payment during a phone call. Apple blocks card reads while a call is active, which surfaces as a checkout failure.
- Hardcoding the minimum iOS version. The floor rises over time. Handle errors 103, 104 and 105 and re-check availability later, since a merchant who updates their device can become eligible.
- Calling
prepareForCheckoutfor a Tap to Pay payment. It exists to wake a Bluetooth reader and is unnecessary here. See Differences from Card Reader Checkouts. - Using
SMPProcessAsPromptUser. It is not supported for Tap to Pay on iPhone and produces an error. See Credit/Debit Selection. - Building against an old SDK. Submit with the latest released version of the SDK, and check the SDK changelog(Opens in a new tab) before you build.
Implementing Tap to Pay
Section titled “Implementing Tap to Pay”With Tap to Pay on iPhone merchants can accept contactless card payments on their iPhone without needing a card reader.
To add Tap to Pay on iPhone to your app:
- Request the Tap to Pay on iPhone entitlement from Apple, receive approval, and then add the
com.apple.developer.proximity-reader.payment.acceptanceentitlement to your app. Setting up the entitlement(Opens in a new tab). - This feature requires an iPhone XS or later and does not work on iPad. The minimum iOS version is raised over time, so treat it as a moving target: as of September 2026 it is iOS 18.7. Do not hardcode a version check — call
checkTapToPayAvailabilityand handleSMPSumUpSDKErrorTapToPayiOSVersionTooOld(104) andSMPSumUpSDKErrorTapToPayMinHardwareNotMet(103) instead, so your app keeps working as the floor moves. - The SDK’s own deployment target is iOS 16.0, which is significantly lower than the Tap to Pay on iPhone minimum. An app that builds against iOS 16.0 must therefore gate Tap to Pay on iPhone at runtime rather than assuming it is available.
- For debugging and testing you will need to be logged into an iPhone with a non-Sandbox Apple ID. Using a Sandbox Apple ID requires both Apple and SumUp implementations to connect to their respective non-production (test) backends, which the SDK does not support.
- During testing use a SumUp sandbox merchant account, to avoid transactions going to the acquirer and transferring real money.
In your code:
- Make a call to check feature availability: is the Tap to Pay on iPhone payment method available for the current merchant?
- Trigger activation if needed. Activation sets up the iPhone to receive payments, shows the merchant how to use the feature, and links the SumUp account and Apple ID.
- Start the checkout.
Check Feature Availability
Section titled “Check Feature Availability”- Call
checkTapToPayAvailabilityonSMPSumUpSDKto check the availability of the Tap to Pay on iPhone payment method. This call, which requires the SDK to be in a logged-in state, may internally perform one or more network calls. - If the feature is not available, your app could, as an example, hide or disable a button or menu item representing the Tap to Pay on iPhone payment method.
- The feature is generally available when the following criteria are fulfilled:
- the iPhone model and iOS version requirements are met
- the user logs in with a SumUp account registered in a country where SumUp supports Tap to Pay on iPhone (temporarily with exception of Brazil)
Perform Activation If Needed
Section titled “Perform Activation If Needed”- Activation must be completed before the first transaction can be performed. Activation means:
- the merchant links their Apple ID with their SumUp account
- the iPhone is prepared, which can take 45 seconds or longer
- This needs to be done once per merchant account, per device.
- In addition to determining feature availability,
checkTapToPayAvailabilityalso indicates whether Tap to Pay on iPhone has been activated yet for the current merchant. - If it has not yet been activated then you should trigger activation by calling
presentTapToPayActivationat a convenient time. Calling it more than once will still show the user education screens each time. Independently, the activation from the initial setup will remain valid.
Definitions
Section titled “Definitions”These methods handle Tap to Pay processing. Note that the SDK supports both Completion Block and async implementation.
/** * Checks whether the Tap to Pay on iPhone payment method is available for the current merchant and whether or * not it requires activation to be performed via a call to * `presentTapToPayActivationFromViewController:animated:completionBlock:`. * * For the merchant to be able to use this payment method the following must be true: * * - The feature must be available in the merchant's country * * - It must be activated. This is where the merchant's Apple ID is linked with their SumUp account and the * iPhone is prepared to work as a card reader. As this can take a minute or so the first time, the * merchant is shown a UI that introduces them to the feature as it initializes in the background. * * The merchant must be logged in before you call this method. * * @param availability YES if the feature is available for the current merchant and it's OK to start activation. * @param isActivated YES if activation has already been done for this device and merchant account */open class func checkTapToPayAvailability(completion block: @escaping (Bool, Bool, (any Error)?) -> Void)
/** * Checks whether the Tap to Pay on iPhone payment method is available for the current merchant and whether or * not it requires activation to be performed via a call to * `presentTapToPayActivationFromViewController:animated:completionBlock:`. * * For the merchant to be able to use this payment method the following must be true: * * - The feature must be available in the merchant's country * * - It must be activated. This is where the merchant's Apple ID is linked with their SumUp account and the * iPhone is prepared to work as a card reader. As this can take a minute or so the first time, the * merchant is shown a UI that introduces them to the feature as it initializes in the background. * * The merchant must be logged in before you call this method. * * @param availability YES if the feature is available for the current merchant and it's OK to start activation. * @param isActivated YES if activation has already been done for this device and merchant account */open class func checkTapToPayAvailability() async throws -> (Bool, Bool)
/** * Performs activation for Tap to Pay on iPhone. This prepares the device, introduces the merchant to the * feature and links their Apple ID to their SumUp account (which will require confirmation from the merchant.) * * Call `checkTapToPayAvailability:` before calling this method to find out if this payment method is available * and if activation is needed. * * The merchant must be logged in before you call this method. * * Tap to Pay on iPhone requirements: * * - The hosting app must have the `com.apple.developer.proximity-reader.payment.acceptance` * entitlement. * * - The merchant must have a supported iPhone model running a supported iOS version. * See the requirements above, as the minimum iOS version changes over time. * The feature does not work with iPads. * * @param fromViewController The UIViewController instance from which the UI should be presented modally. * @param animated Pass YES to animate the transition. * @param block The completion block is called after the view controller has been dismissed. */open class func presentTapToPayActivation(from fromViewController: UIViewController, animated: Bool, completionBlock block: SMPCompletionBlock? = nil)
/** * Performs activation for Tap to Pay on iPhone. This prepares the device, introduces the merchant to the * feature and links their Apple ID to their SumUp account (which will require confirmation from the merchant.) * * Call `checkTapToPayAvailability:` before calling this method to find out if this payment method is available * and if activation is needed. * * The merchant must be logged in before you call this method. * * Tap to Pay on iPhone requirements: * * - The hosting app must have the `com.apple.developer.proximity-reader.payment.acceptance` * entitlement. * * - The merchant must have a supported iPhone model running a supported iOS version. * See the requirements above, as the minimum iOS version changes over time. * The feature does not work with iPads. * * @param fromViewController The UIViewController instance from which the UI should be presented modally. * @param animated Pass YES to animate the transition. * @param block The completion block is called after the view controller has been dismissed. */open class func presentTapToPayActivation(from fromViewController: UIViewController, animated: Bool) async throws -> Bool/** * Checks whether the Tap to Pay on iPhone payment method is available for the current merchant and whether or * not it requires activation to be performed via a call to * `presentTapToPayActivationFromViewController:animated:completionBlock:`. * * For the merchant to be able to use this payment method the following must be true: * * - The feature must be available in the merchant's country * * - It must be activated. This is where the merchant's Apple ID is linked with their SumUp account and the * iPhone is prepared to work as a card reader. As this can take a minute or so the first time, the * merchant is shown a UI that introduces them to the feature as it initializes in the background. * * The merchant must be logged in before you call this method. * * @param availability YES if the feature is available for the current merchant and it's OK to start activation. * @param isActivated YES if activation has already been done for this device and merchant account */+ (void)checkTapToPayAvailability:(void (^ _Nonnull)(BOOL isAvailable, BOOL isActivated, NSError * _Nullable error))block NS_SWIFT_NAME(checkTapToPayAvailability(completion:));
/** * Performs activation for Tap to Pay on iPhone. This prepares the device, introduces the merchant to the * feature and links their Apple ID to their SumUp account (which will require confirmation from the merchant.) * * Call `checkTapToPayAvailability:` before calling this method to find out if this payment method is available * and if activation is needed. * * The merchant must be logged in before you call this method. * * Tap to Pay on iPhone requirements: * * - The hosting app must have the `com.apple.developer.proximity-reader.payment.acceptance` * entitlement. * * - The merchant must have a supported iPhone model running a supported iOS version. * See the requirements above, as the minimum iOS version changes over time. * The feature does not work with iPads. * * @param fromViewController The UIViewController instance from which the UI should be presented modally. * @param animated Pass YES to animate the transition. * @param block The completion block is called after the view controller has been dismissed. */+ (void)presentTapToPayActivationFromViewController:(UIViewController *)fromViewController animated:(BOOL)animated completionBlock:(nullable SMPCompletionBlock)block;Product Name
Section titled “Product Name”tapToPayProductName returns the localized “Tap to Pay on iPhone” string. It is localized in all languages supported by the SDK and exposed as a convenience for use in your app’s UI — use it instead of hardcoding the product name, as Apple may update the branding.
let productName = SumUpSDK.tapToPayProductName()// e.g. "Tap to Pay on iPhone"NSString *productName = [SMPSumUpSDK tapToPayProductName];// e.g. @"Tap to Pay on iPhone"Implementation
Section titled “Implementation”SumUpSDK.checkTapToPayAvailability { isAvailable, isActivated, error in
if let error { // An error occurred return }
if !isAvailable { // Tap to Pay on iPhone is not available for the merchant return }
if !isActivated { // Tap to Pay on iPhone needs activation - call presentTapToPayActivation return }
// The app is ready to take Tap to Pay on iPhone payments!}[SMPSumUpSDK checkTapToPayAvailability:^(BOOL isAvailable, BOOL isActivated, NSError * _Nullable error) { if (error == nil) { if (!isAvailable) { // Tap to Pay on iPhone is not available for the merchant return; }
if (!isActivated) { // Tap to Pay on iPhone needs activation - call presentTapToPayActivation return; }
// The app is ready to take Tap to Pay on iPhone payments!
} else { // An error occurred }}];Start a Tap to Pay Checkout
Section titled “Start a Tap to Pay Checkout”Once checkTapToPayAvailability reports the feature as both available and activated, take a payment by
setting paymentMethod on the checkout request. Everything else works the same as a card reader checkout.
guard let currencyCode = SumUpSDK.currentMerchant?.currencyCode, !currencyCode.isEmpty else { // not logged in return}
let request = CheckoutRequest( total: NSDecimalNumber(string: "10.00"), title: "Coffee", currencyCode: currencyCode, paymentMethod: .tapToPay)
// Tip on Card Reader is never available for Tap to Pay on iPhone.// Collect the tip in your own UI and set it programmatically instead.request.tipAmount = NSDecimalNumber(string: "1.00")
SumUpSDK.checkout(with: request, from: self) { [weak self] (result: CheckoutResult?, error: Error?) in guard let self else { return }
if let error = error as NSError?, error.domain == SumUpSDKErrorDomain, let sdkError = SumUpSDKError(rawValue: error.code) { switch sdkError { case .tapToPayActivationNeeded: // Recoverable: run activation, then retry the checkout. SumUpSDK.presentTapToPayActivation(from: self, animated: true) { _, _ in } case .tapToPayNotAvailable, .tapToPayMinHardwareNotMet, .tapToPayiOSVersionTooOld, .tapToPayRequirementsNotMet: // Not recoverable on this device or account: hide the Tap to Pay option. self.hideTapToPayOption() default: // Handle the shared checkout errors as you would for a card reader checkout. break } return }
guard let result, result.success else { // No charge (cancelled) return }
print("transaction: \(String(describing: result.transactionCode))")}NSString *currencyCode = [[SMPSumUpSDK currentMerchant] currencyCode];if (![currencyCode length]) { // not logged in return;}
SMPCheckoutRequest *request = [SMPCheckoutRequest requestWithTotal:[NSDecimalNumber decimalNumberWithString:@"10.00"] title:@"Coffee" currencyCode:currencyCode paymentMethod:SMPPaymentMethodTapToPay];
// Tip on Card Reader is never available for Tap to Pay on iPhone.// Collect the tip in your own UI and set it programmatically instead.request.tipAmount = [NSDecimalNumber decimalNumberWithString:@"1.00"];
[SMPSumUpSDK checkoutWithRequest:request fromViewController:self completion:^(SMPCheckoutResult *result, NSError *error) { if ([error.domain isEqualToString:SMPSumUpSDKErrorDomain]) { switch (error.code) { case SMPSumUpSDKErrorTapToPayActivationNeeded: // Recoverable: run activation, then retry the checkout. [SMPSumUpSDK presentTapToPayActivationFromViewController:self animated:YES completionBlock:nil]; return; case SMPSumUpSDKErrorTapToPayNotAvailable: case SMPSumUpSDKErrorTapToPayMinHardwareNotMet: case SMPSumUpSDKErrorTapToPayiOSVersionTooOld: case SMPSumUpSDKErrorTapToPayRequirementsNotMet: // Not recoverable on this device or account: hide the Tap to Pay option. [self hideTapToPayOption]; return; default: // Handle the shared checkout errors as you would for a card reader checkout. return; } }
if (result.success) { NSLog(@"transaction: %@", result.transactionCode); }}];Tap to Pay Error Codes
Section titled “Tap to Pay Error Codes”These codes are returned in the SumUpSDKErrorDomain domain by checkTapToPayAvailability,
presentTapToPayActivation and checkoutWithRequest: when the payment method is Tap to Pay on iPhone.
| Code | Objective-C | Swift | Meaning | What your app should do |
|---|---|---|---|---|
| 100 | SMPSumUpSDKErrorTapToPayNotAvailable |
.tapToPayNotAvailable |
Not available for this merchant, typically because it is unsupported in their country. | Hide or disable the Tap to Pay option. Do not retry. |
| 101 | SMPSumUpSDKErrorTapToPayActivationNeeded |
.tapToPayActivationNeeded |
Activation has not been completed for this merchant and device. | Call presentTapToPayActivation, then retry the checkout. |
| 102 | SMPSumUpSDKErrorTapToPayInternalError |
.tapToPayInternalError |
An unspecified error occurred. | Surface a generic failure and allow a retry. |
| 103 | SMPSumUpSDKErrorTapToPayMinHardwareNotMet |
.tapToPayMinHardwareNotMet |
The device is older than iPhone XS, or is an iPad. | Hide the Tap to Pay option permanently on this device. |
| 104 | SMPSumUpSDKErrorTapToPayiOSVersionTooOld |
.tapToPayiOSVersionTooOld |
The iOS version is below the current minimum. | Prompt the merchant to update iOS, then re-check availability. |
| 105 | SMPSumUpSDKErrorTapToPayRequirementsNotMet |
.tapToPayRequirementsNotMet |
Some other requirement is unmet, for example the device passcode is disabled. | Ask the merchant to check their device settings, then re-check availability. |
Differences from Card Reader Checkouts
Section titled “Differences from Card Reader Checkouts”Several card reader APIs described earlier in this guide do not apply to Tap to Pay on iPhone:
lastReaderStatusreturnsniluntil a physical reader has been connected and saved, so it staysnilfor merchants who only ever use Tap to Pay on iPhone. When a status object does exist,readerTypeisUnknownif no physical reader has been connected.isTipOnCardReaderAvailablereports on the last-used physical card reader and isNOwhen none has been used. Tip on Card Reader is therefore not an option for Tap to Pay on iPhone. Prompt for the tip in your own UI and settipAmount, and leavetipOnCardReaderIfAvailableunset.prepareForCheckoutexists to wake a Bluetooth reader, so it is not needed before a Tap to Pay on iPhone checkout. Note that it can fail withSMPSumUpSDKErrorPrepareCheckoutReaderWakeFailed(60) when no reader has ever been paired, which is the normal state for a Tap to Pay-only integration.presentCardReaderSettingsonly manages physical readers and has no Tap to Pay equivalent.
Testing Your Integration
Section titled “Testing Your Integration”In your debug setup you can call +[SMPSumUpSDK testSDKIntegration] or SumUpSDK.testIntegration() in Swift.
It will run various checks and print its findings to the console.
Please do not call it in your Release build.
SDK Structure
Section titled “SDK Structure”The SDK uses Objective C header files, but XCode can also display its public types as Swift. The table below outlines the interfaces in the SDK and their purpose.
| Header (Swift alias) | Purpose |
|---|---|
| SMPSumUpSDK.h (SumUpSDK) | Includes methods and properties for handling authentication, initial SDK setup, presenting checkout view, and testing your integration. Bundles all other headers and serves as the main SDK interface. |
| SMPCheckoutRequest.h (CheckoutRequest) | Includes methods and properties handling checkout requests, such as amounts, currencies, and payment methods |
| SMPCheckoutResult.h (CheckoutResult) | Handles checkout result structure, including status and transaction code |
| SMPCurrencyCodes.h | Defines available currency codes |
| SMPMerchant.h (Merchant) | Describes a Merchant, including Merchant Code (identifier) and currency used by merchant |
| SMPReaderStatus.h | Reader information: battery level, serial number, model type, and active state |
| SMPReaderType.h (ReaderType) | Enumeration of card reader models: Unknown, Pin Plus, 3G, Air, Solo, Solo Lite |
| SMPOfflineSessionDetails.h | Offline session state: remaining time, transaction counts, total approved amount |
| SMPSkipScreenOptions.h (SkipScreenOptions) | Describes options allowing to skip transaction confirmation screen |
| SumUpSDK.h | Declares project version |
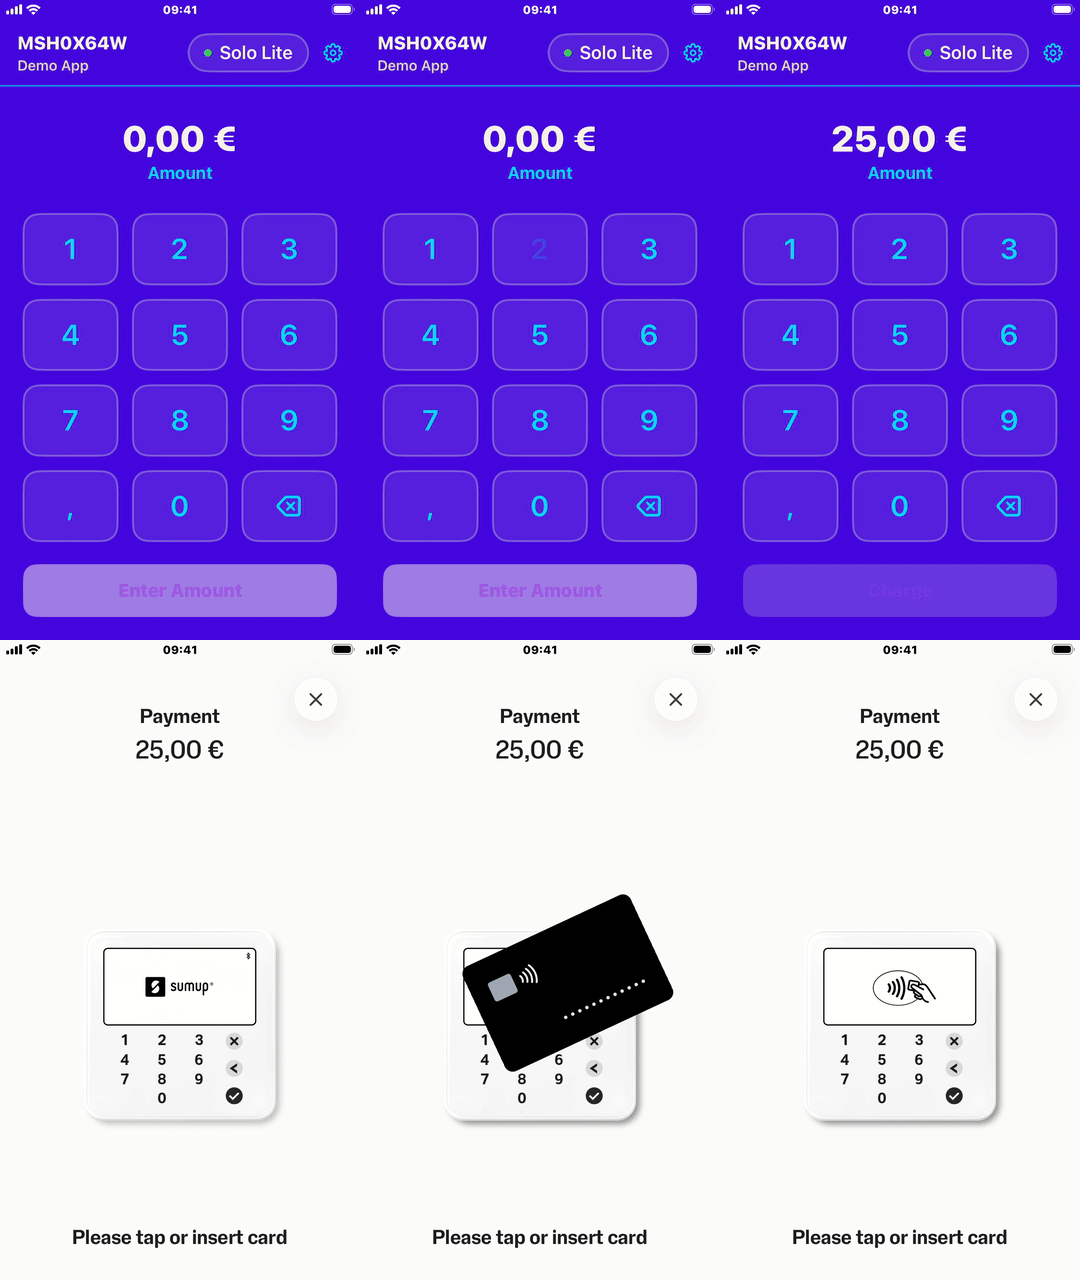
Sample App
Section titled “Sample App”A sample app(Opens in a new tab) is provided in the SDK repository. It demonstrates SDK setup, login, checkout, and card reader settings in a minimal Swift project.
To run it, clone the repository(Opens in a new tab) and open SampleApp/SumUpSDKSampleApp.xcodeproj in Xcode.
Known Issues
Section titled “Known Issues”- In Tap to Pay on iPhone solutions, if entitlements are not correctly set up in your app,
presentTapToPayActivationmay show an error Alert withFailed to show Terms of Service. - Businesses using SumUp sub-accounts must first activate the feature on their main account before using it on devices logged in with sub-accounts, otherwise an error message will appear during activation for the sub-account user.
For the wider set of issues integrators hit with Tap to Pay on iPhone, see Common Mistakes.
Community
Section titled “Community”Got questions or found a bug? Get in contact with our integration team through the contact form.
Out of Scope
Section titled “Out of Scope”The following functions are handled by the SumUp APIs:
What’s Next?
Section titled “What’s Next?”Check other resources we have, such as: